The release of hvps-x means the end of development and support for the original SHVPS described on this page. The files and instructions remain accessible, but we won’t provide upgrades or support. The reason for stopping support is that we don’t have any SHVPS left to work on, nor any LabVIEW license to work on the user interface. If you want to assemble a high voltage power supply, we recommend our new hvps-x.
What is new?
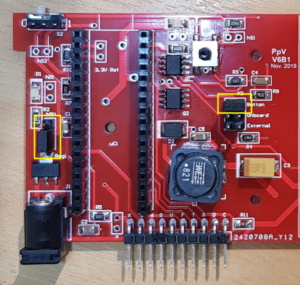
Version 6 of the board has the exact same functionality and schematics than Version 4 (and version 5, described in the HardwareX article). The main difference is that we have modified the components so that they can all be sourced from a single manufacturer (Digikey). Ordering the components should therefore be much easier. The only components that need to be purchased seprarately are the two OC100G High voltage opotcouplers, which can be obtained from VMI, or one of their worldwide distributors.
Previous version
Instructions to assemble board v4bx
1 Pre-assembly Procedure
- Take a PCB and clean it with isopropyl alcohol. Wear gloves during assembly.
- Refer to the bill of material available in the download section to order the required components.
- The Gerber files to manufacture the board are available in the download section. The board can be made for a few dollars from manufacturer such as JLCPCB
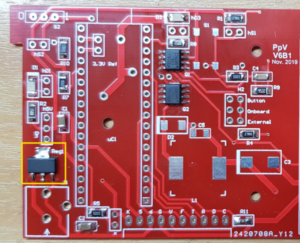
2 Soldering of Low Voltage Components
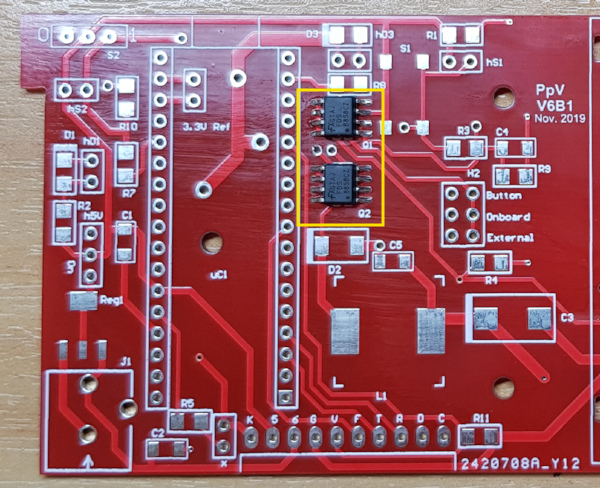
- Solder dual MOSFETs Q1 and Q2. Make sure that the notch on the chip is aligned with the notch on the PCB overlay.
Order code: Digikey FDS8858CZCT-ND
Part number: FDS8858CZ
Description: Dual MOSFET, N and P Channel, 8.6 A, 30 V, 17 mohm, 10 V, 1.6 V

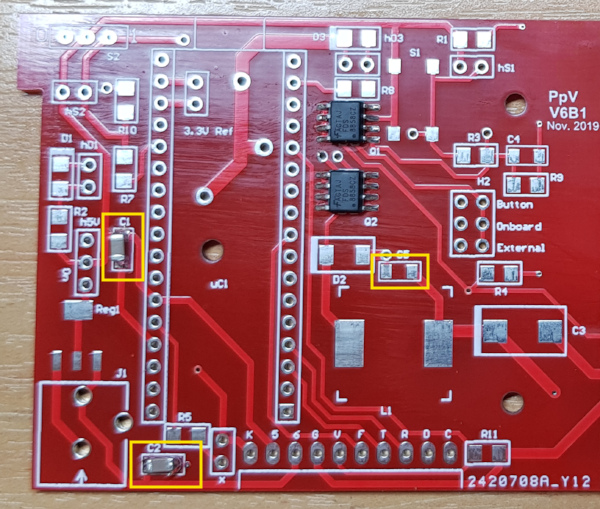
- Solder capacitors C1, C2, and C5. Polarity is not important.
Order code: Digikey 1276-3038-6-ND
Part number: CL31A106KAHNFNE
Description: 10µF ±10% 25V Ceramic Capacitor X5R 1206 (3216 Metric)

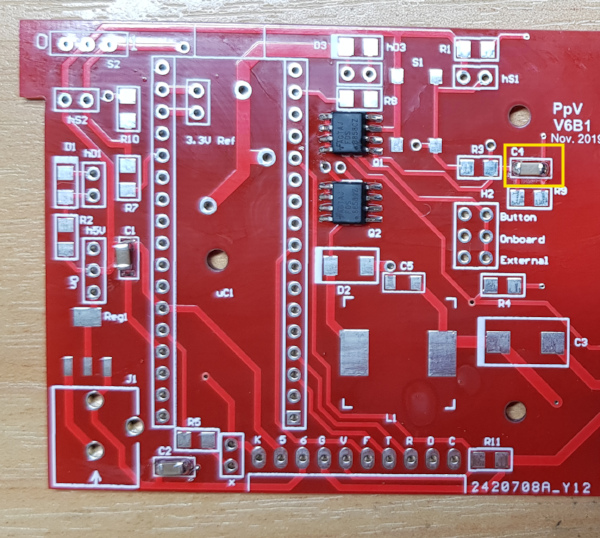
- Solder capacitor C4. Polarity is not important.
Order code: Digikey 399-1285-1-ND
Part number: C1206C334K3RACTU
Description: 0.33µF ±10% 25V Ceramic Capacitor X7R 1206 (3216 Metric)

- Solder the resistors R1 and R4. Polarity is not important.
Order code: Digikey 408-1908-1-ND
Part number: HRG3216Q-27R0-D-T1
Description: 27 Ohms ±0.5% 1W Chip Resistor 1206 (3216 Metric) Anti-Sulfur, Automotive AEC-Q200, Moisture Resistant Thin Film

- Solder resistors R2 and R8. Polarity is not important.
Order code: Digikey CR1206-FX-1500ELFCT-ND
Part number: CR1206-FX-1500ELF
Description: SMD Chip Resistor, Thick Film, 150R, 1%, 0.25W, 1206

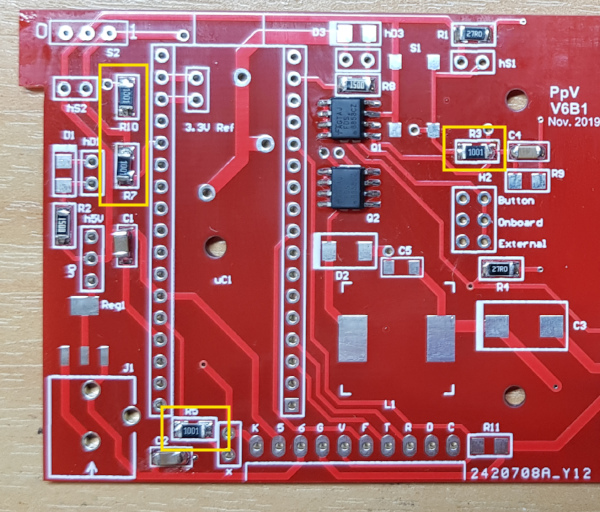
- Solder resistors R3, R5, R7, and R10.
Order code: Digikey 541-2245-1-ND
Part number: RCA12061K00FKEA
Description: 1 kOhms ±1% 0.25W, 1/4W Chip Resistor 1206 (3216 Metric) Anti-Sulfur, Automotive AEC-Q200 Thick Film

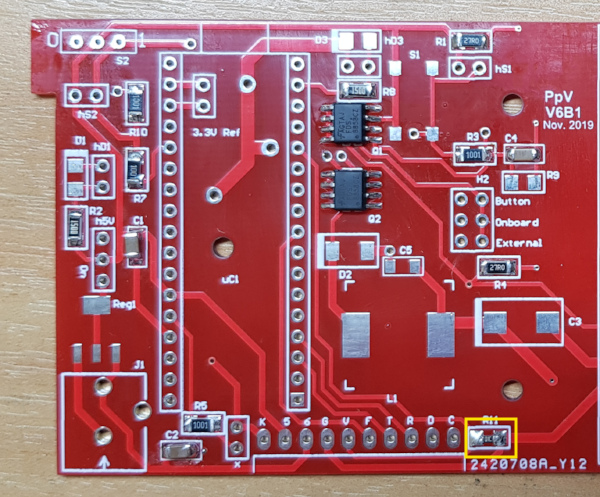
- Solder resistor R11.
Order code: Digikey 311-10KERCT-ND
Part number: RC1206JR-0710KL
Description: RES SMD 10K OHM 5% 1/4W 1206

- Solder resistor R9.
The value of R9 depends on the output voltage of the HVPS. Please select the appropriate value below.
For the 5kV model:
Order code: Digikey 311-95.3KFRCT-ND
Part number: RC1206FR-0795K3L
Description: 95.3 kOhms ±1% 0.25W, 1/4W Chip Resistor 1206 (3216 Metric) Moisture Resistant Thick Film
For the 3kV model:
Order code: Digikey P80.6KFCT-ND
Part number: ERJ-8ENF8062V
Description: RES SMD 80.6K OHM 1% 1/4W 1206
For the 2kV model:
Order code: Digikey P120KFCT-ND
Part number: ERJ-8ENF1203V
Description: RES SMD 120K OHM 1% 1/4W 1206
For the 1.2kV model:
Order code: Digikey 311-88.7KFRCT-ND
Part number: RC1206FR-0788K7L
Description: RES SMD 88.7K OHM 1% 1/4W 1206
For the 500V model:
Order code: Digikey 311-215KFRCT-ND
Part number: RC1206FR-07215KL
Description: RES SMD 215K OHM 1% 1/4W 1206
More details on the design of the voltage divider and the resistance values.

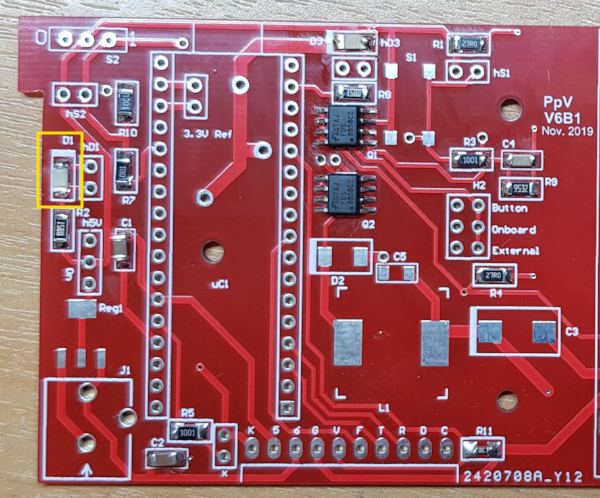
- Solder D1 (Green). Note the polarity! The green markings on top of the LED should face the thick line on the PCB overlay.
Order code: Digikey 67-1002-1-ND
Part number: SML-LX1206GW-TR
Description: LED, QuasarBrite, Green, SMD, 3.2mm x 1.6mm, 20 mA, 2.2 V, 565 nm

- Solder D3 (Red). Note the polarity! The green markings on top of the LED should face the thick line on the PCB overlay.
Order code: Digikey 67-1003-1-ND
Part number: SML-LX1206IW-TR
Description: LED, QuasarBrite, Red, SMD, 3.2mm x 1.6mm, 20 mA, 2 V, 635 nm

- Solder Reg1.
Order code: Digikey NCP1117ST50T3GOSCT-ND
Part number: NCP1117ST50T3G
Description: Linear Voltage Regulator IC Positive Fixed 1 Output 5V 1A SOT-223
- Solder D2. Note the polarity! The line on the diode should match the line on the PCB overlay.
Order code: Digikey 497-5574-1-ND
Part number: STPS2L40U
Description: Schottky diode, 2 A, 40 V, DO-214AA=SMB

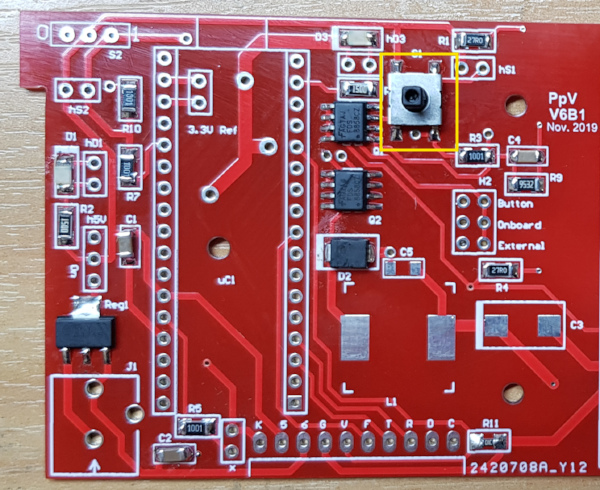
- Solder S1. Polarity is not important
Order code: Digikey SW791-ND
Part number: B3FS-1050
Description: Tactile Switch SPST-NO Top Actuated Surface Mount

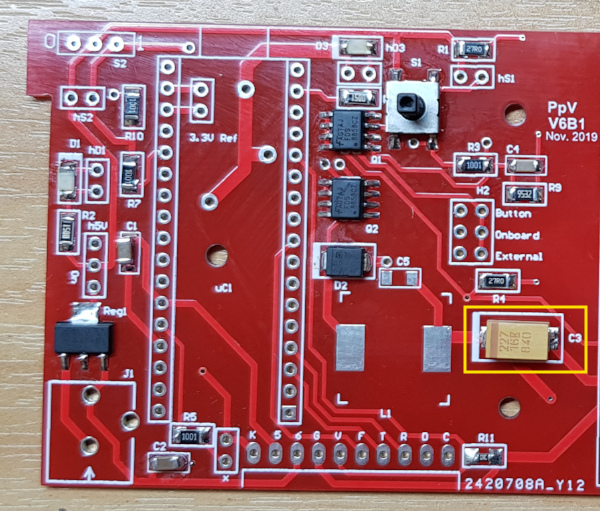
- Solder C3. Note the polarity! The line on the diode should match the marking on the PCB overlay.
Order code: Digikey 399-8415-1-ND
Part number: T491D227K016AT
Description: Surface Mount Tantalum Capacitor, 220 µF, 16 V, T491 Series, ± 10%, 2917 [7343 Metric]

- Solder L1. Polarity is not important.
Order code: Digikey 732-1701-1-ND
Part number: 7447709821
Description: 820µH Shielded Wirewound Inductor 950mA 1 Ohm Max Nonstandard
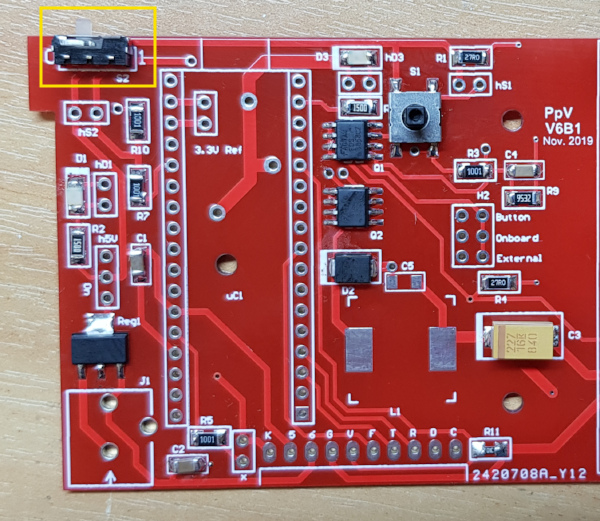
- Solder S2.
Order code: Digikey 563-1571-ND
Part number: MHS122-1
Description: Slide Switch SPDT Through Hole, Right Angle

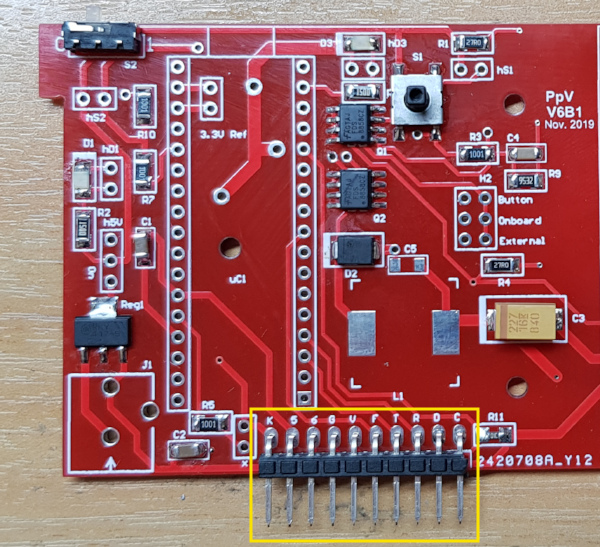
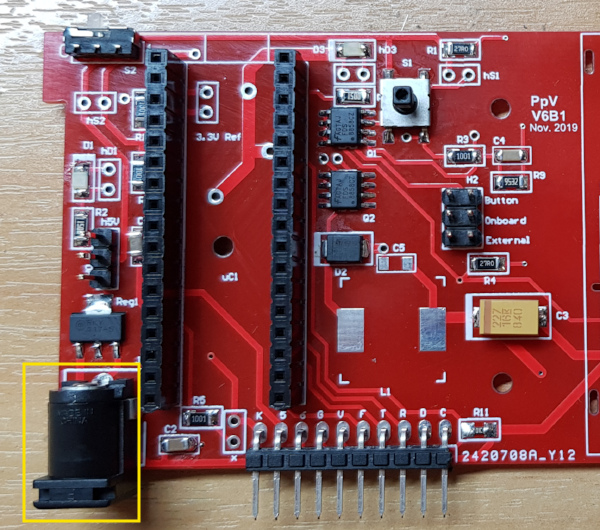
- Solder edge connector K56GVFTRDC. The edge connector is supplied in long strips. Using a pair of pliers break off a row of 10 pins.
Order code: Digikey 2057-PH1RB-17-UA-ND
Part number: PH1RB-17-UA
Description: CONN HEADER R/A 17POS 2.54MM

- Solder h5V. Polarity is not important.
Order code: Digikey 732-5316-ND
Part number: 61300311121
Description: Pin header 3P Single row / straight / without shroud

- Solder hD1, hD3, hS1, hS2 if you intend to have components D1, D3, S1, S2 panel mounted. Polarity for these headers is not important.
Order code: Digikey SAM1121-02-ND
Part number: SSA-102-S-G
Description: SAMTEC SSA-102-S-G Board-To-Board Connector, SSA Series, 2 Contacts, Receptacle, 2.54 mm, Through Hole, 1 Rows
If you intend to place the board in the minimalistic enclosure, soldering these headers is not necessary. If you intend to place the board in the full enclosure, only headers hS1 and hS2 are necessary.

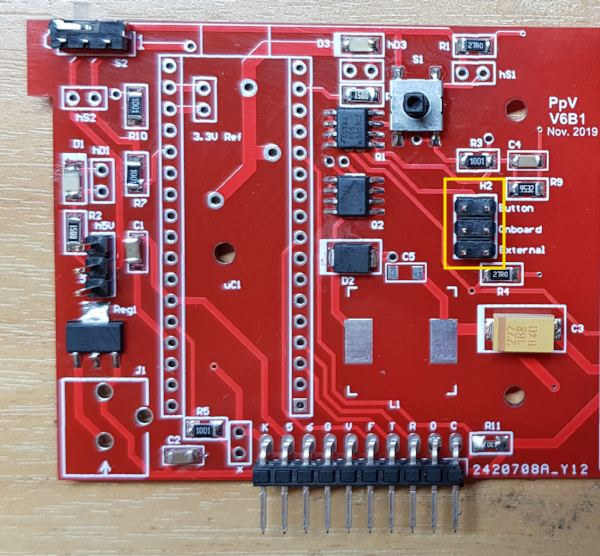
- Solder H2. Polarity is not important.
Order code: Digikey 952-2120-ND
Part number: M20-9980345
Description: Board-To-Board Connector, Vertical, M20 Series, 6 Contacts, Header, 2.54 mm, Through Hole, 2 Rows

- Solder J1.
Order code: Digikey CP-102BH-ND
Part number: PJ-102BH
Description: Power Barrel Connector Jack 2.50mm ID (0.098″), 5.50mm OD (0.217″) Through Hole, Right Angle

- Solder header sockets for microcontroller. The header sockets are supplied in long strips. Score the plastic with a craft knife and break off 17 contacts with a pair of pliers. Clean up the rough edge with the craft knife or sandpaper.
Order code: Digikey SAM1093-17-ND
Part number: SLW-117-01-T-S
Description: CONN RCPT 17POS 0.1 TIN PCB

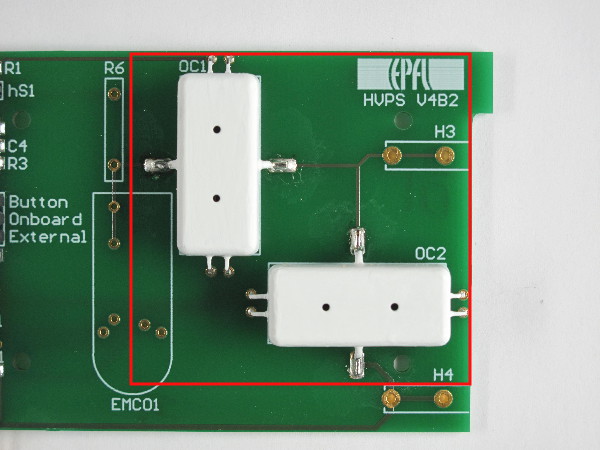
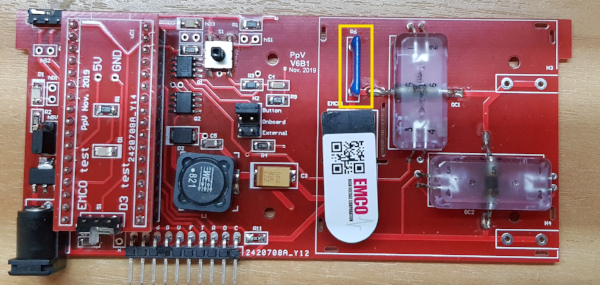
- Prepare optocouplers OC1 and OC2. Please follow the instructions below:
Bending of the leads:
Bend the leads as shown in the series of images below.

Mark pin 1 (before painting):
Bend the tip of pin 1 so that it can be identified after painting the optocoupler.
Painting of the optocoupler:
The optocoupler is painted to prevent interference from neighbouring optocouplers and IR light which is present in the environment. Tipp-Ex is used because it creates a relatively good barrier to IR light and is easy to apply. Simply paint the plastic body of the optocoupler with a single layer of Tipp-Ex and let it dry. It is best to do it rapidly and in single strokes. Making multiple passes results in a sticky mess which is very unsightly.
Mark pin 1 (after painting):
Use a permanent pen to mark pin 1 with a dot next to the pin.
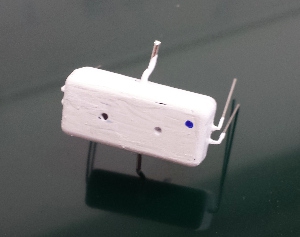
Order code: MPI Distribution AG OC100G
Part number: OC100G
Description: HV Opto-Coupler 10 kV - Solder optocouplers OC1 and OC2. Make sure that the polarity is correct.
- Place the jumper on h5V in the ON position, and the jumper h2 in the Button position.
Order code:Digikey S9001-ND
Part number: SPC02SYAN
Description: 2 (1 x 2) Position Shunt Connector Black Closed Top 0.100″ (2.54mm) Gold
- You are ready to test the low voltage part of your HVPS


3 Testing procedure of the Low-voltage part of the HVPS
Before assembling the High-voltage components, go through the low-voltage testing procedure and ensure that the circuit is working properly. Only proceed with the assembly of the HV components if all the low voltage tests have passed.
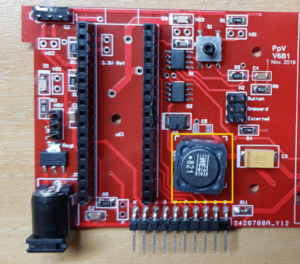
4 Soldering of High Voltage Components
- Solder R6. Do not fully insert this resistor. Insert it so that 2mm of the leads can be seen above the top surface of the PCB.
The value of R6 depends on the output voltage of the HVPS. Please select the appropriate value below.
For the 5kV model:
Order code: Digikey SM102031006FE-ND
Part number: SM102031006FE
Description: OHMITE SM102031006FE Through Hole Resistor, Slim-Mox, 100 Mohm, 5 kV, Radial Leaded, 1 W, ± 1%, Slim-Mox Series
For the 3kV model:
Order code: Digikey SM102035005FE-ND
Part number: SM102035005FE
Description: RES 50M OHM 1W 1% RADIAL
For the 2kV model:
Order code: Digikey SM102035005FE-ND
Part number: SM102035005FE
Description: RES 50M OHM 1W 1% RADIAL
For the 1.2kV model:
Order code: Digikey 22MGBCT-ND
Part number: HHV-50FR-52-22M
Description: RES 22M OHM 1/2W 1% AXIAL
For the 500V model:
Order code: Digikey 22MGBCT-ND
Part number: HHV-50FR-52-22M
Description: RES 22M OHM 1/2W 1% AXIAL
More details on the design of the voltage divider and the resistance values.

- Solder EMCO1
EMCO1 is the DC/DC converter of the HVPS, and its voltage rating defines the maximal output voltage of the HVPS. Use the following values:
For the 5kV model:
Order code: Digikey 1470-3201-ND
Part number: A50P-5
Description: 5 kV AG Series Isolated, Proportional DC To HV DC Converter 5V input
For the 3kV model:
Order code: Digikey 1470-3200-ND
Part number: A30P-5
Description: 3 kV AG Series Isolated, Proportional DC To HV DC Converter 5V input
For the 2kV model:
Order code: Digikey 1470-3198-ND
Part number: A20P-5
Description: 2 kV AG Series Isolated, Proportional DC To HV DC Converter 5V input
For the 1.2kV model:
Order code: Digikey 1470-3192-ND
Part number: A12P-5
Description: 1.2 kV AG Series Isolated, Proportional DC To HV DC Converter 5V input
For the 500V model:
Order code: Digikey 1470-3184-ND
Part number: A05P-5
Description: 500 V AG Series Isolated, Proportional DC To HV DC Converter 5V input
 sk
sk - Solder the red HV socket H3
Order code: Digikey 486-3655-ND
Part number: 0040.1102
Description: Socket ø 2 mm red, 0040.1102, Schurter

- Solder the black HV socket H4
Order code: Digikey 486-3654-ND
Part number: 0040.1101
Description: Socket ø 2 mm black, 0040.1101, Schurter


5 Testing procedure of the High-voltage part of the HVPS
Once you have finished the assembly of the high-voltage components, you are ready to test the high-voltage portion of the circuit. Follow these instructions.
6 HV cables
- Cut the appropriate length of HV electrical cable.
Red wire:
Order code: Digikey W2722R-100-ND
Part number: 2722/22 R/C
Description: TEST LEAD 22AWG 5000V RED 100′
Black wire:
Order code: Digikey W2722B-100-ND
Part number: 2722/22 B/C
Description: TEST LEAD 22AWG 5000V BLACK 100′ - Manually enlarge the opening of the 2mm banana plug cover with a 3mm drill bit so it can fit over the HV cable.
Red banana plug:
Order code: Digikey 501-1318-ND
Part number: 5936-2
Description: Banana Plug Connector Miniature Solder Red
Black banana plug:
Order code: Digikey 501-1345-ND
Part number: 5936-0
Description: Banana Plug Connector Miniature Solder Black - Solder the banana plugs to the wires and install the protective covers
- At the other extremity of the cable, install the connector you need for your application. We use Alligator clips as versatile connectors.
Red Clip:
Order code: Digikey 36-5034-ND
Part number: 5034
Description: ALLIGATOR CLIP INSULATED RED
Black Clip:
Order code: Digikey 36-5035-ND
Part number: 5035
Description: ALLIGATOR CLIP INSULATED BLACK

7 Next steps
Once you have finished assembling and testing (Low voltage testing, High voltage testing) your HVPS, you should place in in a safe enclosure and proceed with configuration/calibration.