The release of hvps-x means the end of development and support for the original SHVPS described on this page. The files and instructions remain accessible, but we won’t provide upgrades or support. The reason for stopping support is that we don’t have any SHVPS left to work on, nor any LabVIEW license to work on the user interface. If you want to assemble a high voltage power supply, we recommend our new hvps-x.
Back to the Python HVPS User Interface
Check Description of the Python interface for an explanation of each control and indicator of the interface
The Python user interface has been developed with touchscreen in mind (e.g. stand-alone configuration or running on a tablet). However, it can of course also be run on desktop or laptop, or any other platform with a keyboard. For those cases, we have included handy keyboard shortcuts to make the interface more convenient to use.
Shortcuts in the main interface window
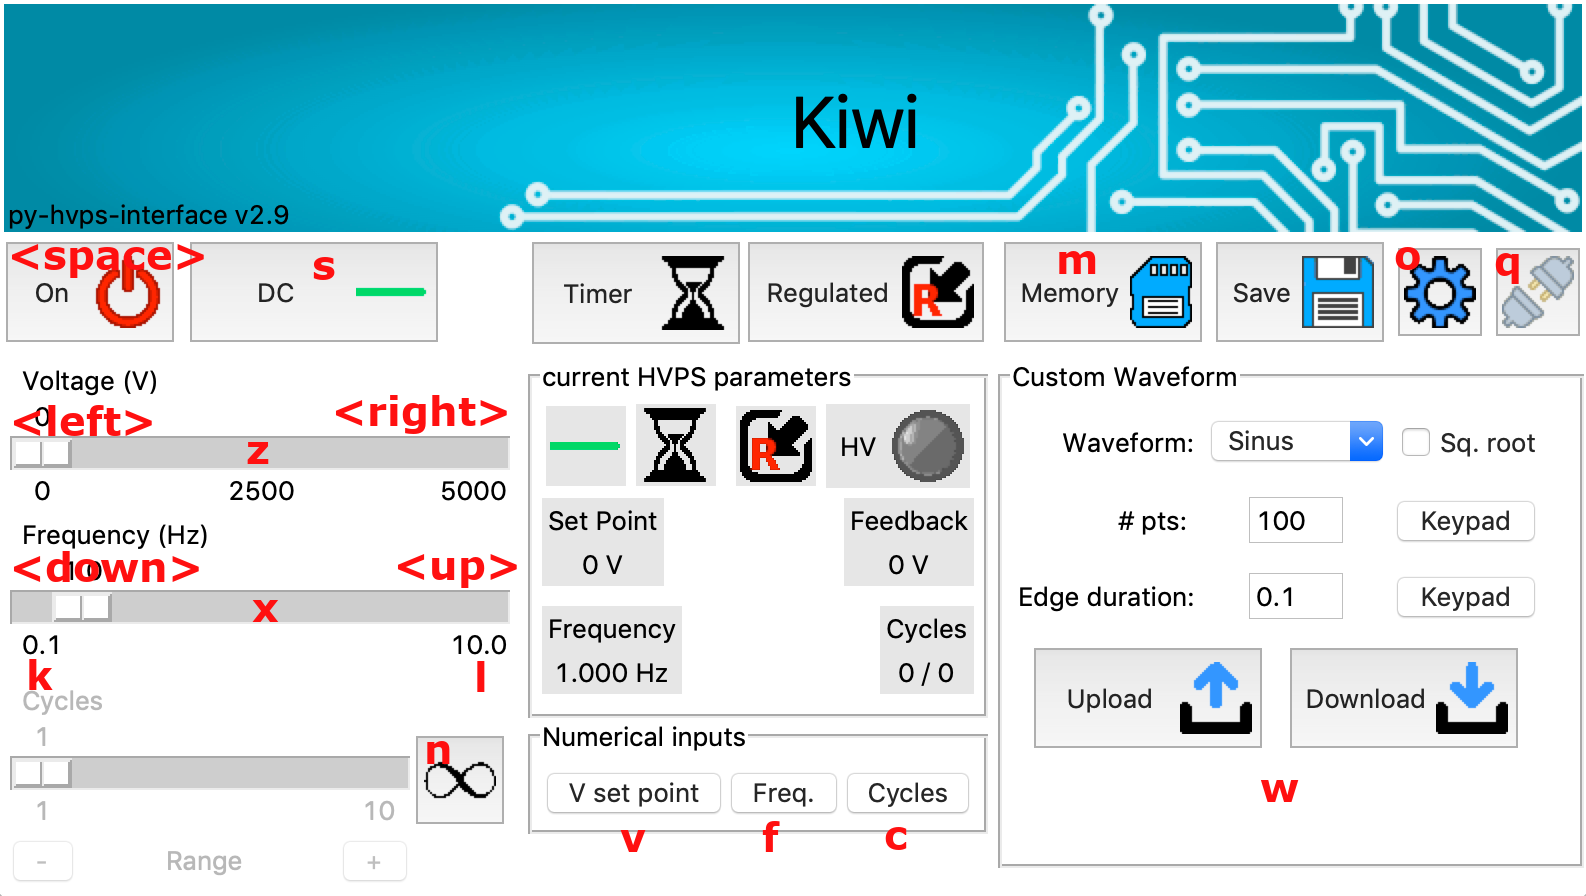
- [<space bar>]: toggle output on/off
- [s]: Change the switching mode (DC/Switching/Waveform)
- [<right>]: increment voltage
- [<left>]: decrement voltage
- [<up>]: increment frequency
- [<down>]: decrement frequency
- [v]: display numerical input to set the voltage
- [f]: display numerical input to set the frequency
- [c]: display numerical input to set the number of cycles
- [n]: toggle the number of cycles between infinity and finite number n
- [z]: changes the resolution of the voltage slider (1 –> 10 –> 100 –> 1)
- [x]: changes the resolution of the frequency slider (multiplies by 10 until fmax/10, then goes back to 0.001)
- [k]: changes the lower bound of the frequency slider (between 0.001 and fmax/10)
- [l]: changes the upper bound of the frequency slider (between fmin*10 and 1000)
- [w]: toggle the right panel of the GUI between strobe mode and waveform mode
- [m]: Display the content of the memory
- [o]: Display the options dialogue box
- [q]: quit the programme
Note that [z], [x], [k], and [l] can be useful to adapt the slider to one particular task. However, if the resolution or bounds of the slider needs to have permanent defined values when the interface starts, this can be done in the config.ini file.
Shortcuts in the numerical input dialogue box
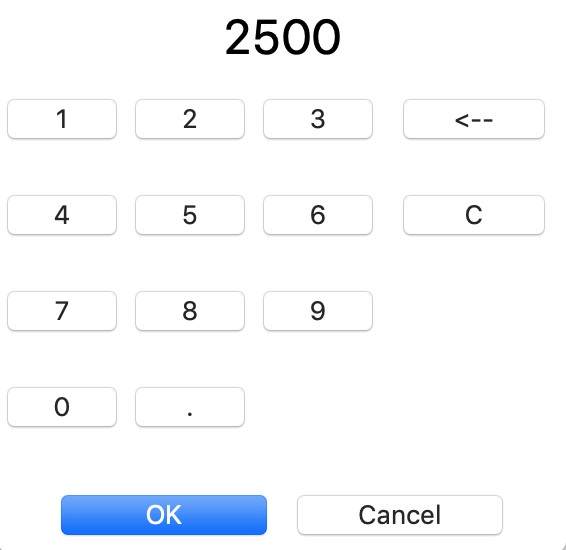
- [0] to [9]: 0 to 9
- [.]: decimal point
- [<Enter>]: accepts new entered value
- [<Escape>]: Cancel (closes dialogue box discarding the new value)
- [<BackSpace>]: Deletes the rightmost digit (or decimal point)
Example
a few examples on how to use the keyboard for common tasks
- Setting voltage to 4500V: v4500<Enter>
- Toggles output off, change frequency to 2.5Hz, toggles switching mode to switching (from DC), toggles output on: <Space>f2.5<Enter>s<Space>